Posts

Showing posts from August, 2013

Front Porch Fall Decor

Image
 It's Friday!!!  Yay for 3-day-weekends, and yay for football season kicking off.  We have a busy weekend ahead of us with lots of food, friends and football. But before all of my guests arrive, I have a long list of to-do's.  I can check the front porch off the list though. It's done. For now at least.  We have a tiny front porch...I'm not even sure you could really call it a front porch. It's more of a pass through.  It's not big enough to have big beautiful displays like the front porches below:   source unknown source unknown However, it looks barren when nothing is there.  Everything has to be small in scale when decorating this porch because I want my guests to feel welcome at the front door, not claustrophobic.   I couldn't really get a good full scale picture of the porch. The brick wall kind of takes up the picture, but in person it's much more inviting...I promise:o) And, yes, I did just water the plants before taking the shot. It l...

Painting a Pillow

Image
Is anyone else being hammered by hot temperatures right now? Even though it's blazing hot here in the South, it hasn't deterred me from working away on Fall decor. I'm so glad you are back here today with me. I have a little tutorial on how to spruce up a plain burlap pillow using stencils and fabric paint.  I found this image on  Pinterest .  I fell in love with the pillow and thought "how fun would that be on my  new bench ".  If anyone knows the source of this photo, please let me know so I can give them credit. Thanks!! So I gathered all the supplies I needed.  A pillow form(purchased), burlap(purchased), stencils, black fabric paint, and paint brush.   I made the pillow cover, and added a zipper. I am really into adding zippers to pillows because it makes it easier to clean the covers. If you are able to do it, I would highly recommend it!! After the pillow cover was made, I taped some paper to the width of the cover and traced the letters on...

Fall Centerpiece

Image
About two weeks ago, we had a little cold spell. The humidity was gone, and the weather was perfect. Just enough chill in the air that you had to grab a light jacket in the evenings. We actually built a fire and roasted marshmallows a couple nights in a row. It was wonderful! Now we're back to the sticky-wearing-the-outside-weather..blech! That cooler weather made me want Fall here in a bad sort of way. Fall is my most favorite time of the year, and I love decorating for it. Even though it's still August, I'm busting out the pumpkins, y'all! September will eventually get here, Lord willing, so it's ok to have the pumpkins out, right? Last Christmas, I used this planter for our center piece , and filled it with the same greenery, but just added Christmas-y stuff. I wasn't sure if it would work for Fall because it was so green, but it seems to be working.  The pictures are slightly over exposed, so the green is screaming right now, but in person, it's toned d...

Old Bench Makeover

Image
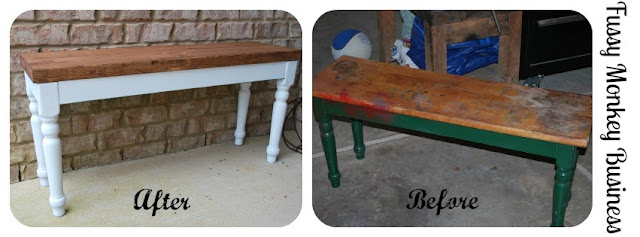
I started playing around with  picmonkey.com  today...yep, I know I am behind the times.  I'm going to have lots of fun with this new-to-me site! Notice the B & A collage picture...well it's more like A & B because I'm new to this collage making business. I'll get the hang of it...eventually. Anywhoodles, today I am sharing a little bench makeover.  This little guy was a yard sale find. It belonged to a little old man, and he used it as his work bench. As you can tell from the top, it got lots and lots of use. He passed away, and his wife had no use for it, so she sold it to me for $1.  I'm really digging the painted furniture with the wooden tops, so this bench seemed like the perfect piece to try out that technique. The top & sides of the bench seat had a thin veneer surrounding MDF. The seat had to go because, well, just look at it. It has seen better days. The 90's ivy green paint was definitely an eye sore as well.  But there were good bone...

Burlap Wreath Tutorial

Image
I.am.ready.for.fall. Since Fall is around the corner, and I have a few spare moments with the kiddos back in school, I have been able to catch up on some decor projects I have been wanting to tackle. One of them being a burlap wreath.  You can't have Fall without a burlap wreath. It's in the rule books somewhere...I'm sure of it.  There are so many different styles. Raggedy, bubbly, smooth, etc. I went for more of a shabby look...sounds better than raggedy, right? Today I'm sharing how quick and easy this project is.   Your list of supplies: 3 yards of burlap(I used two colors)(Burlap is $3.99 at my Hobby Lobby. I used a 40% off Q) Wire hanger( Joan Crawford would die) Needle Nose pliers Scissors Tape Measure Start off by cutting your strips. I cut mine at 5" wide. Then you will want to straighten out the wire hanger.  Once all of the burlap is cut, do a fan fold. When finished, you will roughly have a 5x5 square. Thread the wire hanger through the square.  ...

Drawer-Turned-Bathroom Shelf

Image
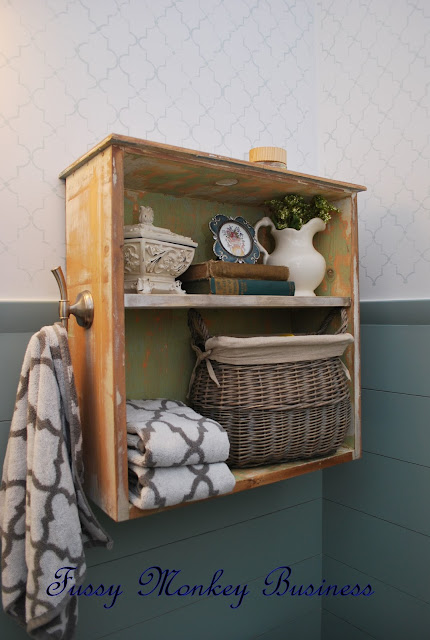
School is back in session here, so I actually have time to sit down and do some posts. I realized today that there are several projects that I talked about on Facebook, but never posted about them, so I 'm going to have to get with it:o) Speaking of Facebook, the  LEGO Table  has been unbelievably popular. Y'all have been blowin' up my feed! It's already more popular than my  Menu Board ...cuh-razy! So today is all about this cute little shelf that's hanging in our newly remodeled half bath . This is where I started. I found this drawer, along with another on the side of the road when I was on my way to drop S.R. off for preschool last year. The hubs wasn't happy about it, so to the attic it went and sat for over a year.  I've seen a lot of drawer-to-shelf makeovers here lately but I really didn't know where I would put one until I was in need of a shelf for the bathroom. Awesome!  I was not about to sand this piece down because I didn't know what ki...

Half Bath Makeover

Image
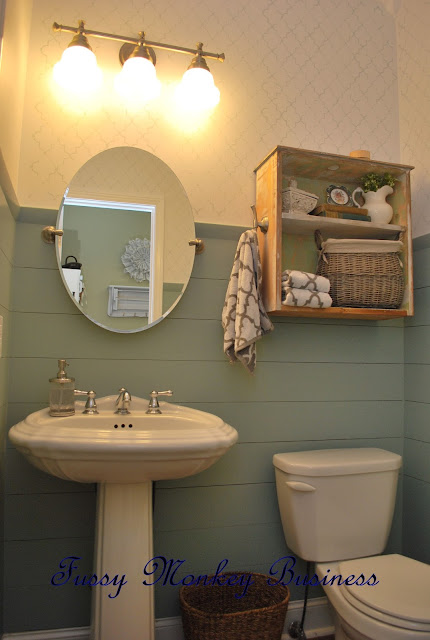
We put the finishing touches on our half bath this weekend. I am thrilled with the end result. It's definitely more my taste than the "before". I found my inspiration from  The Lettered Cottage . I absolutely looove their blog, and if you haven't checked them out yet, you should really take the time to do so. You'll be glad you did.  I get so excited every time I walk by this room. This was the before. Chocolate brown, and it looked like a hole in the wall...literally. We are putting in an in-home salon because I am a hair stylist, and one of the requirements is to have access to a bathroom from the salon area. Thankfully, the half bath is right beside the area we will have the salon. The hubs cut out the drywall, and made an opening for the new door. He made a brace above the frame to make sure everything was stable.                                              ...