Posts

Showing posts with the label Boy Stuff

Back to School Shirts

Image
The regular school routine has set in, and things seem to be moving along just fine. It has taken this mommy a little more adjusting than these two kiddos.  They were both pumped and ready to go. Me, not so much. I miss them. The first day back broke my heart and I might have sobbed like a baby...in front of my baby...who is now a kindergartner. My kindergartner might have shed a few tears because her mother lost it in front of her, but waited for her to leave. Such a strong little girl. My first grader was a brave and happy little soldier. He's an old pro at this sort of thing now; in his mind's eye. It does my heart good to see how happy they are with their teachers and their classmates. My favorite part of the day is when they get in the car at the end of the school day, smiles beaming, ready to tell me every detail of their day...competing to see who can tell the most. Yes, I know these days are very short lived, and there will come a time when they won't say two words ...
LEGO Table

Image
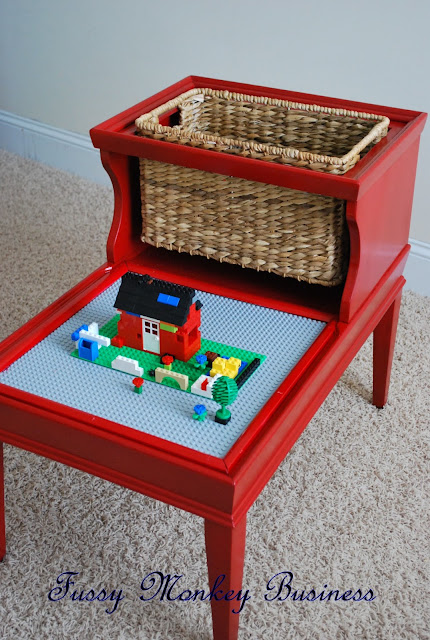
I have been in major build mode this week. I have stepped away from the sewing machine, and have been trying my hand at power tools. I have had so much fun, and I LOVE that my husband keeps a well stocked garage:o) I have had this table in the attic for about two years. I purchased it from a local yard sale page for $5. It was an awkward sort of table and very dated, but when inexpensive furniture presents itself to me, I buy immediately and ask questions later...it's not always the best approach, but my approach, nonetheless;o) A couple of nights ago, we were all in the playroom building LEGO scenes, and that's when the idea struck me that E needed a LEGO table.  And, so it was. This was the before..a very dated, very drab piece of furniture.  I used a jig saw to cut out the top....very LOUD, I might add...and, no I was not wearing any ear protection. It was a hot and humid day, so the red spray paint didn't want to dry. I had to spray a coat, and then bring it inside betw...

New Chore Charts

Image
Now that summer break is here, I decided it was time to reinstate the chore responsibilities for the kiddos. Last year, I made a chore list , and my intentions were to teach E and S.R. responsibility and the value of hard work, but my system was truly broken and our excitement for it lasted all of one week.  Expecting my kids to do the same things over and over again day after day was just expecting too much. I certainly don't do the same things day after day. We all need a little variety, right? So to fix my broken system, I searched on line for age appropriate chores.  It's truly amazing what little ones can do...we really don't give them enough credit. If you check my Pinterest board , you can visit the sites where I found my ideas... This particular idea came from the Martha Stewart website .  Thankfully this little project was mostly free to me. I had one sheet of magnet paper left. I printed the kids' pictures and the chores with the money value on them(in 25 cent...

Easter Outfits-Boy's Vest and Bow Tie

Image
I shared with you guys the other day S.R.'s Easter dress , and today I wanted to give you a closer look at E's vest and bow tie. This has to be the easiest thing to sew for little boys, and it looks so cute!  I purchased the vest pattern last year when the kids' were in my uncle's wedding . I lost the instructions somewhere in my craft closet, but thankfully found the right pattern pieces to make the vest..and to answer your question, yes, my craft closet is a disaster, and no, I never put anything away where it belongs. I work in total chaos;o)  The fabric was purchased from Hobby Lobby. I bought 1 yard, and after using my coupon, it came in at just under $5. Not bad, eh? The bow tie has velcro on the ends to keep it closed around the neck.  I really need to do a tutorial on how to make a bow tie. You wouldn't believe how easy it is to make these things!!  Little man loved this outfit, and it always makes me proud when they get excited about what I make for them:o...

Our First Christmas Craft of the Season

Image
I hope you all had a great Thanksgiving! We surely did!! We got back home on Friday, so there was plenty of time to get settled and relax a bit before starting the work/school week. The holiday baking has begun, so I have to make sure I keep my running shoes broken in, or I'll be asking Santa for the next dress size up;o)  Our first Christmas craft was peppermint Christmas trees.  Thing 1 & 2 worked very hard at unwrapping many many peppermint discs...most made it on the trees...a few ended up in their bellies:o) We started with tacky glue, but that was a bust..wet glue and sugary candy aren't a good mix..so we had to pull out the hot glue gun.  I did all of the gluing, but this was a craft that required all hands on deck, so they didn't get bored with me doing the work. We had a lot of fun crafting, snacking, and listening to Christmas music. Oh yeah, there was a wedding over Thanksgiving holiday:o) Here are a few shots of the kids in their outfits I made.  I am...

Boy's Vest and Bow Tie

Image
A day late, I know, but here is E's vest and bow tie.  I used a pattern for the vest, which was very confusing by the way. That's one of the reasons I like making my own patterns. I can piece the puzzle together quicker than I can read instructions and try to make sense of what they're trying to tell me:o) Anyway, I am glad to have it done!  The bow tie took about 35 minutes to make from start to finish. I think I will be making more of these. It's so stinkin' cute! The hubs even said he wanted some bow ties:o)  Tomorrow is the big day. The kids are pumped, and the hubs and I are reeeally nervous:o) Not about the kids being the flower girl and ring bearer...they'll be fine...the hubs is playing the music and I am taking the wedding pics...no pressure..no pressure at all..ahhh! I hope you all have wonderful Thanksgiving. Make sure to treasure every moment with your family, (no matter how annoying you might think they are, for those of you dreading it). You never ...

Some New Sewing Projects for Boys

Image
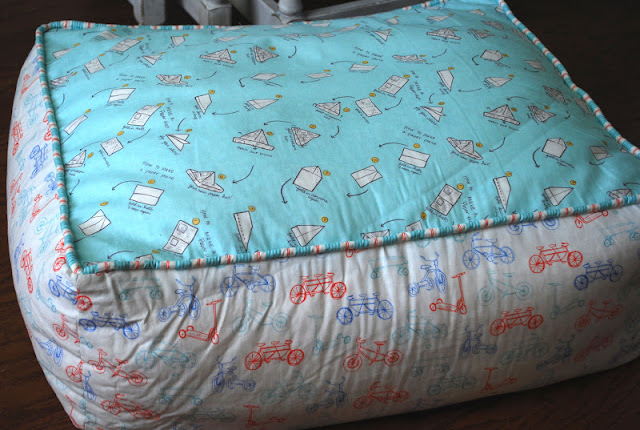
Sewing for a little girl is so easy. There are so many cute inspirations out there for girls, but there really isn't a whole lot to choose from for little boys. Sometimes I feel guilty when I make something for S.R. because for every 3-4 things I make for her, I make 1 for E. Sad, I know. It's a fine line when sewing for boys because some things out there are border-line ridiculous. You have to take great care in not making your boy look like a girl.  So anywhoodles, I went to Heart and Home Fabrics  on Etsy, and  let E pick out some really cute fabric from the "Children at Play" line by Sara Jane.  I made this cute little bean bag ottoman from it. If I ever get around to it, I will do a tutorial because S.R. wants one as well:)  I also made him a cute little vest out of the same fabric. Yes, it coordinates with his ottoman, but how often is he going to be wearing that vest while sitting on the ottoman? ;o) I'll have a tutorial on how to make a vest very so...

Red Ribbon Week Poster-Master Yoda

Image
Since I have been out of school for longer than I am willing to admit, there are a few things that I had forgotten about...one of them being Red Ribbon Week. I am constantly being reminded of how the world isn't all roses and cupcakes. The thought of teaching my children to stay away from drugs had never crossed my mind until we got a letter from the guidance counselor about Red Ribbon Week. Yikes! How do you explain drugs to a 6 year old who has been completely sheltered? We struggled through it, but I think he got the gist of it. He knows their bad, and God doesn't want us to harm our bodies. So, since we are all about Star Wars, he wanted to include Master Yoda on his poster. The hubs knows all when it comes to S.W., so he came up with the slogan. Pretty catchy, huh? We flipped through some coloring books, and E picked this image for his poster. I used my little projector, and traced it in pencil. He traced over the pencil marks in black marker, and then colored it in with c...

Batman Cape

Image
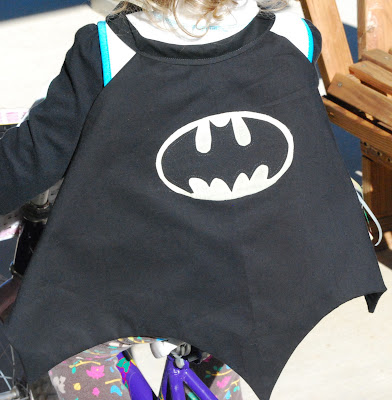
Last Saturday was my first time out this year for yard sales. I was pumped and ready to go...but apparently those needing to rid themselves of unwanted junk were not of the same mindset. I only came across 3 yard sales near us:o( I found a few things, but nothing that you would call a "treasure." Anyway, the last yard sale I went to had a lot of dress up clothes, mainly for girls, but they did have a Batman mask. I snatched that up b/c I new that E would have a fit over it. I was right:o) So I thought  I would make him a Batman cape to match. I got busy making it yesterday, and I was so excited to show it to him. He was really excited to see it...and then he put it on... He said, "Where are the holes so that I can fly?" with utter disappointment.  I apparently told him that I was going to make little pockets for him to put his hands in so that he could spread the cape out, but the way I made the cape, it wasn't possible. He then told me that he didn't want i...

Lucky Shirt

Image
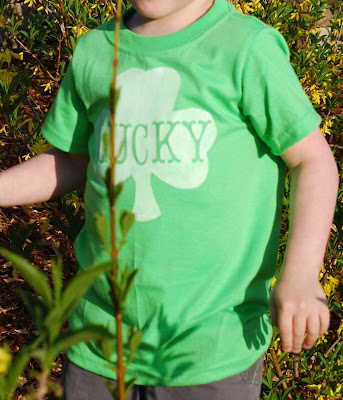
I know that in the last post I shared t-shirts with you, but some things have come up this week that haven't allowed me to get done what I had set out to do for this week. I did get this shirt made for E yesterday so that he would have something green to wear for St. Patty's Day....by the way... Happy St. Patty's Day to you all:o) He was really excited about this shirt. I am sure that a lot of you have seen all of the tutorials out there for freezer paper stenciling. That's how I made this shirt. Really easy. I will definitely be making some more shirts using this technique. *** Just a little note to all you lovelies out there. I am going to take a break from blogging for probably about a week or so. I have some dresses that I have to alter for some girls in the coming days, and my mother is having surgery next week and will be needing my assistance. So with all of that on my plate, I won't have time to do any other crafts. Just keep checking back periodically, or s...

Appliqued Boy's T-Shirts

Image
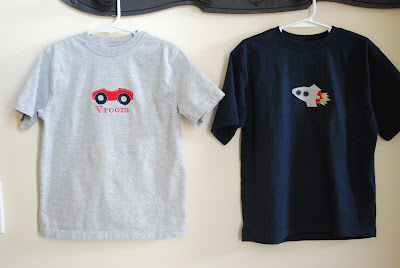
Here are some cute little T's that I made for E. He is so excited about these:o) The shirts were purchased from Walmart. The only thing I don't like about their boy t-shirts is they have a pocket. I have to remove the pockets and that is definitely a pain, but I do love paying only $3.50 for each shirt. I can't decide which I like best.  They are so fun:o) They took very little time to make and E is so happy about them. He can't wait to wear them to preschool. I have some fabric that I purchased from Joann's the other day that will match BOTH of these shirts perfectly. I see some new shorts in E's very near future;o) *** I am in the process of reconstructing my site. Hopefully it will be easier to access things, and look a little cleaner:o) 

"Explorer" Messenger Bag

Image
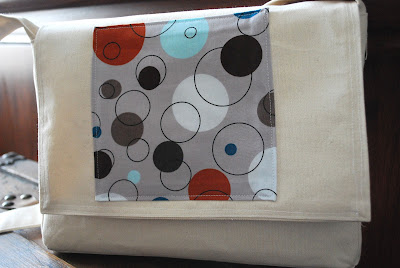
I know that during the week last week, I just kind of sprung on you guys that I would be hosting "a boy" week.  I realized that there just aren't enough projects out in bloggy world concerning our little boys. It's hard to create for them. You don't normally hear cute, crafty and boy in the same sentence:o) So hopefully this week, we can help change that a little;o)   E has patiently watched me make things for S.R. for the past few weeks and I told him his time was coming. And now it's here:o) To start the week off, I am sharing with you this messenger bag. We are labeling it as an "Explorer" bag, so that it sounds a lot cooler than it actually is:o) I had some leftover canvas from my kitchen curtains, and a little bit of "boy" scrap fabric in my closet, so this project was 100% free to me. Here are the measurements for the bag: 6-12"x9" panels(main panel and flap) 4-9"x3" panels(the sides) 2-12"x3" panels(the ...